 Save to Pinterest
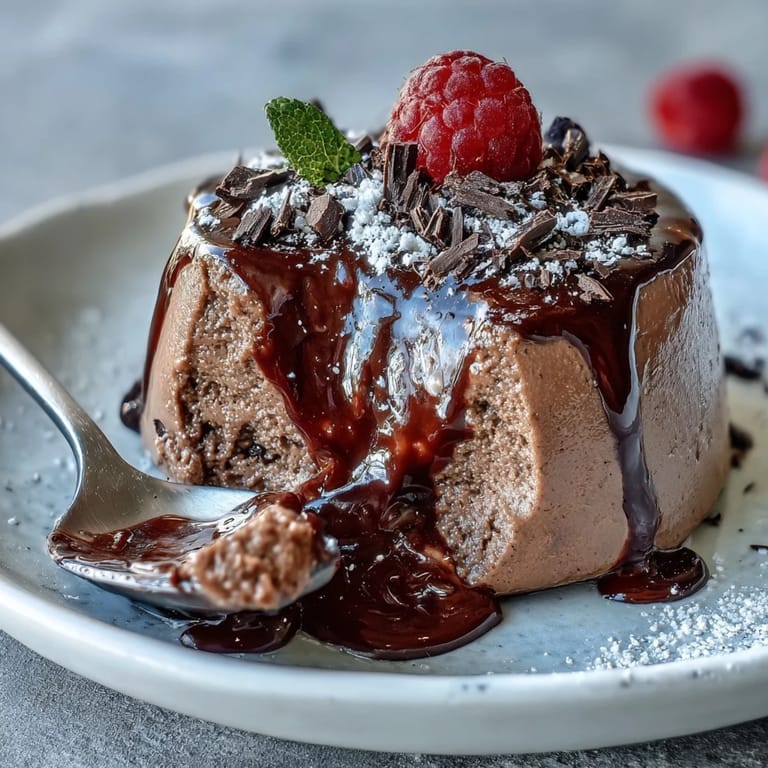
 The idea for this chocolate mousse started when I was caught in a rainstorm, craving something sweet but not wanting to fuss over the stove. I had a last-minute urge for dessert, just cottage cheese and a bag of chocolate chips staring at me from the fridge. I still remember the surprised look on my partner’s face when I dragged out the blender and started throwing things in. The scent of cocoa mingled with vanilla reminded me that improvisation in the kitchen can spark genuine joy. There’s something a little mischievous about transforming wholesome cottage cheese into velvety, chocolatey bliss.
One Tuesday afternoon, my sister stopped by unexpectedly and we ended up catching up over ramekins of this mousse, chocolate smudges on our fingertips. Sharing this dessert with her ended up being the perfect excuse to linger at the kitchen counter, the kind of small stolen break that ends up meaning more than you realize.
Ingredients
- Cottage cheese: This gives the mousse its signature silky texture and a protein boost; blending is the secret for smoothness.
- Milk (dairy or plant-based): Adds just enough liquid to swirl everything together; start slow so the mousse stays thick.
- Unsweetened cocoa powder: The cocoa’s richness brings out that deep chocolate flavor; sift it to avoid any lumps.
- Dark chocolate chips, melted: A splash of melted chocolate takes the richness up a notch—microwave them gently so they don’t seize.
- Maple syrup or honey: Sweetens everything with a lovely, rounded note; taste and adjust depending on your chocolate.
- Vanilla extract: Just a splash pulls all the flavors together, making the chocolate pop.
- Fresh berries, shaved chocolate, whipped cream (optional): These toppings make every serving feel a bit celebratory, even on an average day.
Tired of Takeout? 🥡
Get 10 meals you can make faster than delivery arrives. Seriously.
One email. No spam. Unsubscribe anytime.
Instructions
- Build your base:
- Spoon cottage cheese, milk, cocoa powder, melted chocolate, sweetener, and vanilla into your blender or food processor. You’ll hear the thump and whirl as everything comes together—scrape the sides so nothing gets left behind.
- Blend for silkiness:
- Blend on high for a good 1–2 minutes until the mixture looks impossibly smooth and glossy. Touch a spoonful to your lips—it should feel luxurious, not grainy.
- Adjust for sweetness:
- Sample a bit and stir in a drizzle more sweetener if you want a little extra decadence. Quick taste tests are mandatory in my kitchen.
- Set and serve:
- Divide the mousse among glasses or bowls. If you have the patience, pop them in the fridge for thirty minutes for a firmer texture that almost melts on your tongue.
- Finish with flair:
- When ready, crown each mousse with berries, extra chocolate shavings or a cloud of whipped cream—whatever makes it feel special for you.
 Save to Pinterest
  Save to Pinterest
 My favorite memory tied to this mousse is serving it at an impromptu game night; spoons clinking, laughter echoing, and the mousse disappearing before the cards were shuffled. In that moment, it wasn’t just dessert—it was the reason to pause and enjoy each other’s company.
How to Make It Your Own
Playing with toppings or mix-ins always keeps things interesting—sometimes I’ll sprinkle espresso powder into the blend or stir in orange zest for a bright twist. Don’t be afraid to lean into what you love most about chocolate mousse and tweak from there.
Making It Vegan or Dairy-Free
I’ve tested this with almond milk and plant-based cottage cheese and it holds up beautifully—just be sure your chocolate is dairy-free, too. The swap keeps the mousse creamy and satisfying without missing out on chocolate intensity.
Storing and Serving Tips
This mousse stays lush for up to two days in the fridge; cover tightly to keep it fresh and silky. scooping into glass jars for grab-and-go treats is especially handy.
- Let the mousse sit at room temp a few minutes before serving for the creamiest texture.
- A pinch of flaky sea salt over the top makes the chocolate sing.
- Remember: the longer it chills, the more luxurious it feels.
 Save to Pinterest
 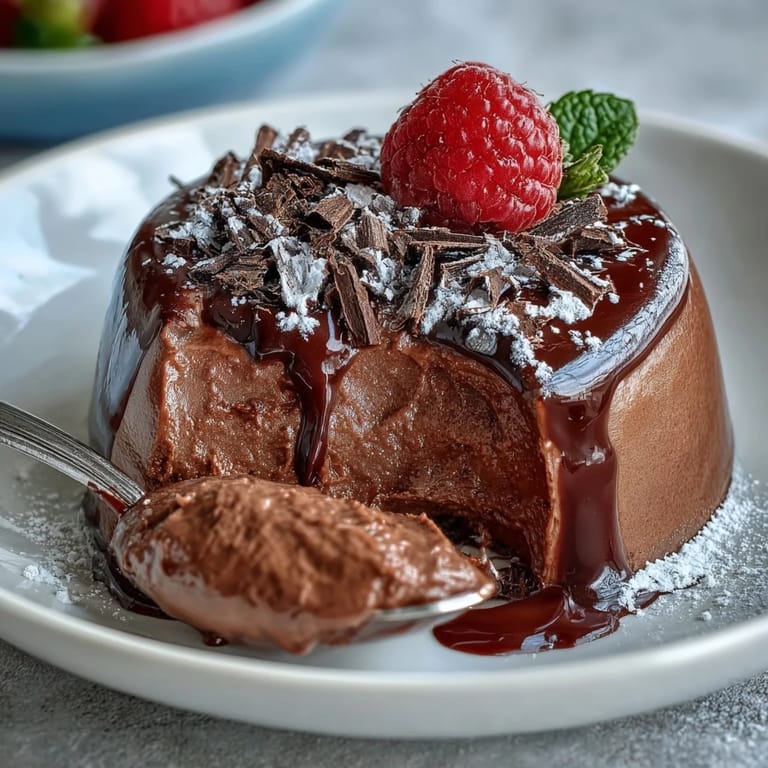 Save to Pinterest
 Chocolate mousse that comes together in minutes has a way of making any night feel special. Whenever you serve this, expect smiles and surprise at just how simple it was to create.
Recipe FAQs
- → Can I use low-fat cottage cheese?
Yes. Low-fat cottage cheese yields a lighter mousse with less richness. For a creamier texture, choose full-fat or add a splash more melted chocolate or a tablespoon of Greek yogurt.
- → How do I make this dairy-free?
Use a plant-based cottage cheese alternative and plant milk, and choose dairy-free dark chocolate. Blend the same way and chill; texture will depend on the plant-based product's creaminess.
- → Is a high-speed blender necessary?
A high-speed blender or food processor gives the smoothest result by fully breaking down curds. If using a regular blender, blend longer and scrape sides frequently to achieve creaminess.
- → How long should it chill before serving?
Chilling for at least 30 minutes firms the mousse and improves texture, but it can be served immediately if preferred. Longer chilling (up to 2 days) develops flavor and sets the mousse further.
- → How can I adjust the sweetness?
Taste after blending and add more maple syrup or honey a teaspoon at a time until you reach the desired balance. Unsweetened cocoa and dark chocolate levels will affect perceived sweetness.
- → What toppings and variations work best?
Fresh berries, shaved dark chocolate, toasted nuts or a light whipped cream complement the mousse. For extra richness stir in a little extra melted chocolate; for a lighter option fold in whipped aquafaba or yogurt alternative.