 Save to Pinterest
 The very first time I made Japanese Milk Bread, the kitchen filled with a scent that immediately made me stop mid-whisk just to breathe it in: warm, sweet, almost like vanilla mingling with fresh cream. As the Tangzhong bubbled on the stove, I found myself nudging the spoon in tiny circles, curious to see just how something so simple could become the famous cloud-like loaf I'd heard about. I never thought a bread recipe would turn me into the most patient person in the house, watching dough rise with the anticipation usually reserved for birthday cakes. There’s something quietly magical about waiting for those pillowy swells in the pan. Even now, I’m always tempted to pull off a corner before it’s fully cool.
One rainy Saturday, I ended up baking a loaf just as my friends stopped by unexpectedly; the kitchen windows fogged over as we sliced the still-warm bread and debated whether butter or jam made for the best topping. That afternoon, every time someone reached for another piece, someone else insisted we needed ‘just one more test’—and the entire loaf disappeared before the kettle cooled. The memory of that cozy chatter still floats up whenever I knead this dough. Sometimes, a recipe’s best moments happen right after the timer dings. Now, they all ask for milk bread instead of dessert.
Ingredients
- Bread flour: The higher protein content helps deliver that iconic chewy-but-soft texture—sift before using for best fluff.
- Instant yeast: This skips the proofing step, but I always check freshness by smelling it—should be slightly nutty, never sour.
- Whole milk: Adds rich flavor and moisture; I’ve learned room temperature milk gives happier dough.
- Egg: The secret behind that tender crumb—crack it into a small bowl first to avoid shell mishaps.
- Sugar: Bakes up with a gentle sweetness, nothing cloying—sprinkling it in slowly keeps everything from lumping.
- Unsalted butter: Softened but not melting; knead it in gradually for silky smooth dough (resist the urge to rush this part).
- Fine sea salt: Rounds out the flavors beautifully—too much will toughen the bread, so measure with care.
- Tangzhong (flour, water, milk): This paste is the heart of the whole loaf; let it cool to lukewarm so it blends gently with the dough.
- Milk for brushing: A quick sweep transforms the crust into that signature golden sheen—you’ll see the difference in the oven.
Tired of Takeout? 🥡
Get 10 meals you can make faster than delivery arrives. Seriously.
One email. No spam. Unsubscribe anytime.
Instructions
- Cook the Tangzhong:
- Whisk flour, water, and milk in a small saucepan over medium heat until it thickens to a glossy paste—this is soothing, slow work, and you’ll know it’s ready when you see lines at the bottom as you stir.
- Mix the Dough:
- In your mixer bowl, blend flour, sugar, salt, and yeast. Pour in cooled Tangzhong, warm milk, and egg; mix just until clumps form—it will look a bit rough at first.
- Knead Until Silky:
- Once incorporated, work in softened butter a little at a time; knead until the surface is elastic and smooth, stretching without tearing when gently tugged.
- Let It Rise:
- Transfer the dough to a greased bowl, cover, and set in a cozy spot (even near the preheating oven works); watch for it to double, which means bubbles within and a softly domed top.
- Shape the Loaf:
- Punch down, split into three pieces, and roll each into a rectangle. Fold in the sides, then roll up tightly into snug logs and line them up in your loaf pan—seam sides down for best effect.
- Second Rise:
- Cover again and let the logs puff until almost reaching the rim—don’t rush, this is where ultimate softness is built.
- Bake to Perfection:
- Brush with milk and bake at 350°F until tops glow golden brown and the loaf sounds hollow when tapped; your kitchen will smell incredible.
- Cool and Enjoy:
- Wait at least 10 minutes before lifting from the pan, then cool fully on a rack, though I always sneak the first slice with a bit of steam still escaping.
 Save to Pinterest
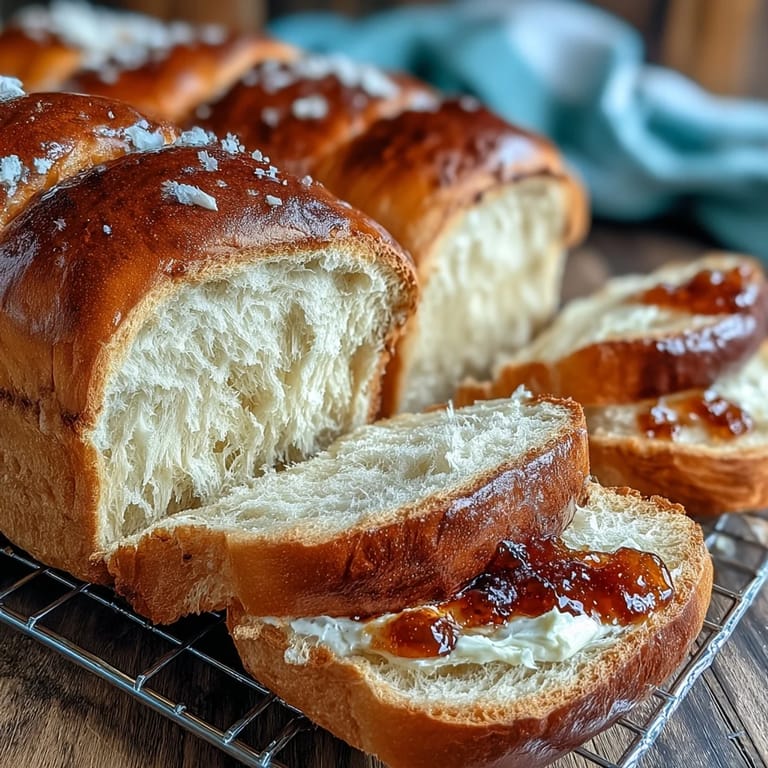
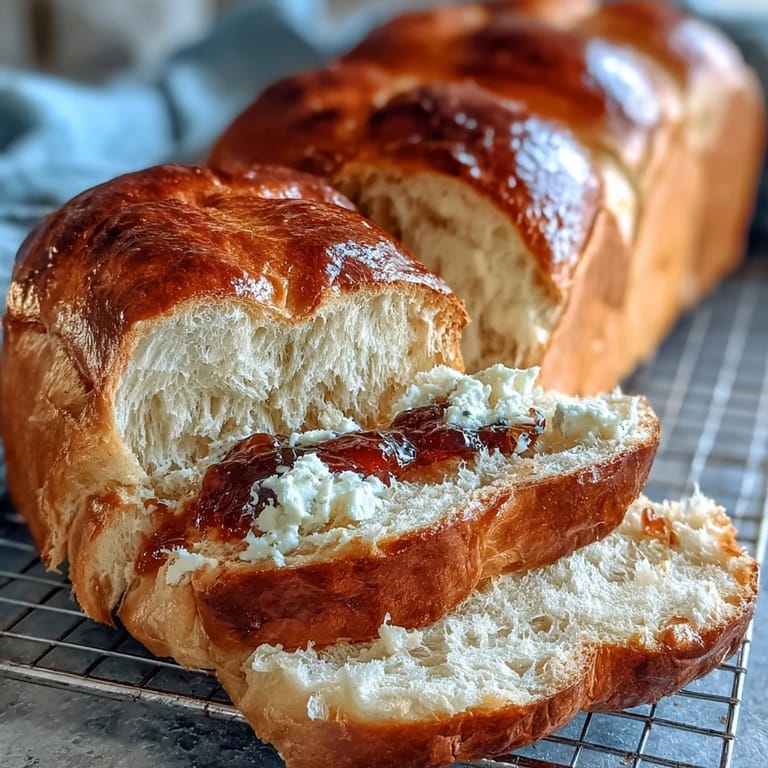
 The day this bread made its way into our family breakfast rotation, I found my usually sleepy teenager waiting in the kitchen, butter knife in hand just as the loaf cooled. Watching him grin through a mouthful—peeking at the swirl of the crumb—cemented it: some homemade breads really are worth the wait. Moments like that turn a recipe into a tradition. Quiet morning light and the smell of baking bread make for a perfect start, even on the busiest days.
Getting Dough Texture Just Right
When the dough’s been kneaded enough, it stretches in your hands without snapping, feeling almost pillow-like but slightly tacky. If it sticks too much, add a dusting of flour, but avoid making it dry—the real magic is in a soft, elastic dough. I’ve found that weather can shift things: on rainy days, I need a pinch more flour. Give the dough time to hydrate before adding more flour—patience pays off here. Watching how the dough feels is more reliable than any clock.
Shaping the Perfect Swirl
I used to rush shaping, which led to uneven loaves and gaps inside. Taking a moment to gently press and roll each piece made for even spirals and a tidy top crust. That extra care doesn’t take long but makes slices look bakery-level every time. Don’t worry if your swirls aren’t perfectly tight on the first try—they’ll get tidier each time you bake. Practice might not make perfect kitchen selfies, but it guarantees delicious bread.
How to Serve and Store for Peak Freshness
As tempting as it is to dig in right away, letting the loaf cool fully helps slices stay soft and hold their shape, especially for sandwiches. I store it in an airtight container, which keeps it fresh for several days, but it almost never lasts that long. Toasting thick slices brings the aroma right back—and a little butter or jam is never a bad idea.
- Swapping a bit of milk for cream makes the bread extra rich
- Don’t skip brushing with milk before baking—it boosts the golden crust
- Try adding a splash of vanilla for a subtle twist
 Save to Pinterest
 Baking Japanese milk bread always reminds me how a few gentle steps create something extraordinary. Here’s to slices that vanish almost as quickly as they’re made—enjoy every soft bite.
Recipe FAQs
- → What is Tangzhong and why use it?
Tangzhong is a cooked flour-and-liquid paste (usually milk and water) that hydrates the starches. It helps the loaf retain moisture, gives a softer crumb, and slows staling so the loaf stays fresh longer.
- → How do I know when the dough is kneaded enough?
Look for a smooth, elastic dough that’s slightly tacky but not sticky. The windowpane test—stretching a small piece until it becomes thin and translucent without tearing—is a reliable indicator.
- → Can I substitute bread flour or milk alternatives?
Bread flour gives better structure and chew; all-purpose flour can be used but the crumb will be softer and less springy. Whole milk adds richness—swap part of the milk for heavy cream for extra softness or use plant milk for a dairy-free version, noting the texture will change.
- → How should I shape the loaf for the classic top?
Divide the dough into three equal pieces, roll each into a tight log, then place them seam-side down, side-by-side, in a greased 9x5-inch loaf pan. This creates the familiar domed, pull-apart top as it rises and bakes.
- → How can I tell when the loaf is fully baked?
Bake until the top is deep golden and the loaf sounds hollow when tapped. For more precision, the internal temperature should reach about 190–200°F (88–93°C) in the center.
- → What’s the best way to store or freeze the loaf?
Cool completely, then store in an airtight container or bag at room temperature for a few days. For longer storage, slice and freeze portions wrapped tightly; thaw slices at room temperature or toast directly from frozen.