 Save to Pinterest
 As soon as the sweet aroma of vanilla and butter begins to swirl in the kitchen, I cannot help but smile, knowing I am crafting Taurus Zodiac Cookies—each one a tiny, edible celebration. Years ago, while experimenting with celestial-themed treats for a friend’s birthday, these cookies were my leap into the world of frosted elegance and shiny gold. The satisfying snap as I first bit into a cool, gold-brushed star shape is the memory that truly sets this recipe apart. I love how no matter your zodiac, there is something secretly magical about shimmering cookies lined up in a gift box. And every batch somehow feels like a fresh, fun challenge.
Once, on a chilly May evening, my cousin and I took turns with the cookie cutters, giggling every time our Taurus bulls ended up slightly lopsided—proving perfection is in the fun. We played upbeat music, swept flour from the countertops, and debated the best Taurus traits as the smell of baking cookies filled the house. I still remember us quietly painting golden horns with trembling hands, both nervous but proud. By the time the cookies were boxed and tied with a ribbon, we had made something uniquely ours. That’s the memory I reach for whenever a new batch comes out of the oven.
Ingredients
- All-purpose flour: Choose a high-quality brand for dependable structure, and be sure to measure by spooning into the cup and leveling for accuracy.
- Unsalted butter, softened: Use real butter left at room temperature to guarantee those crisp, buttery edges—and avoid greasiness.
- Granulated sugar: Whipping the sugar and butter until pale is a little kitchen magic for a tender crumb.
- Large egg: Bring it to room temperature so it blends evenly, resulting in a smoother dough.
- Pure vanilla extract: This is the backbone of the aroma—don’t be tempted by imitation.
- Almond extract (optional): Just a splash adds depth, but if you’re not a fan, try citrus zest as a twist.
- Salt: Surprising but necessary, balancing the sweetness and enhancing flavors.
- Powdered sugar, sifted: Sifting prevents lumps so the royal icing glides easily over cookies.
- Egg whites or meringue powder: Both will work; meringue powder is safer for gifting if you’re concerned about raw eggs.
- Lemon juice: Brightens both icing and flavor—don’t skip this secret weapon.
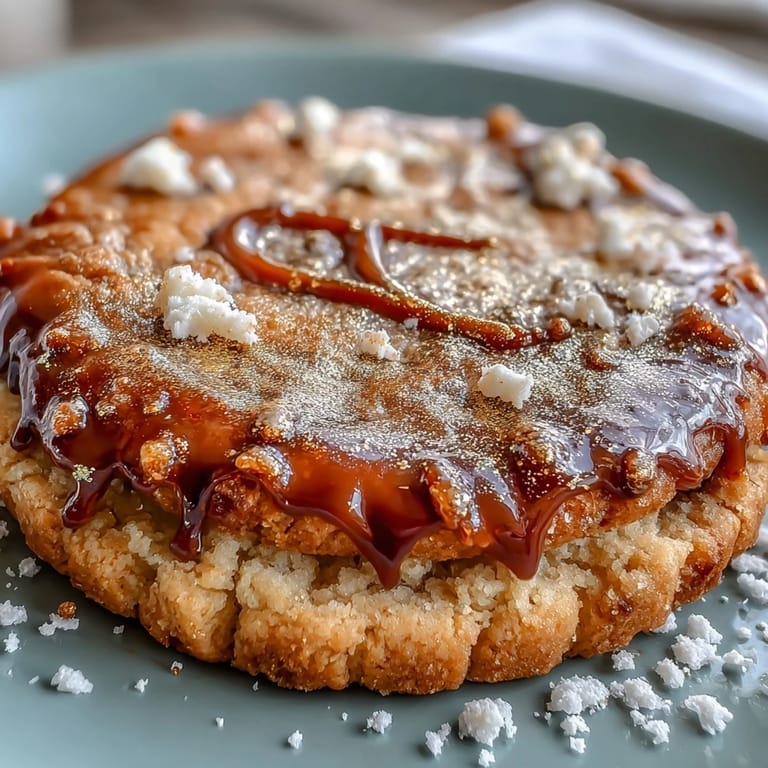
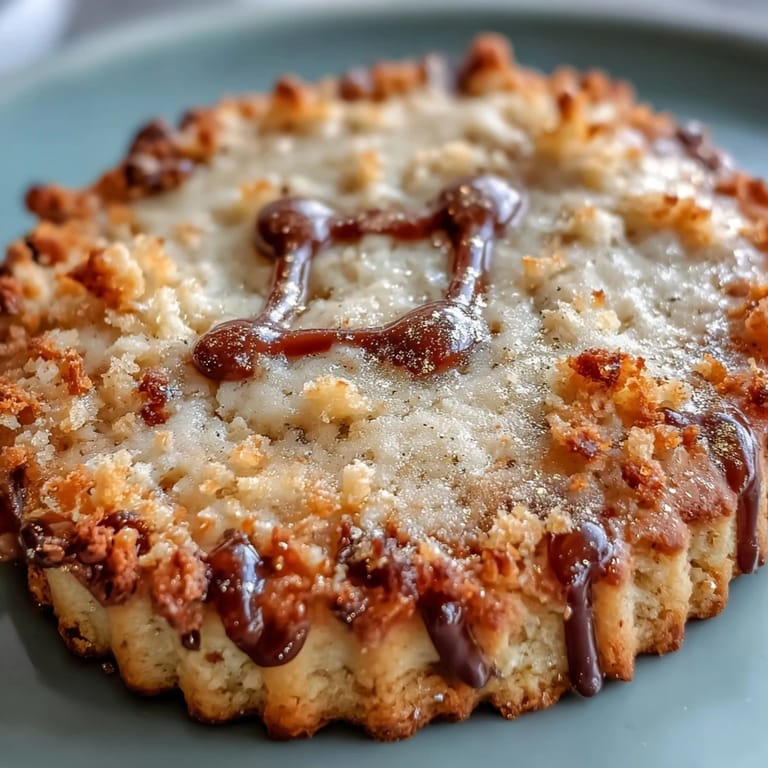
- Edible gold luster dust: For true zodiac glam, nothing else gleams quite like it; mix only with clear alcohol for sharp lines.
- Clear alcohol (vodka or lemon extract): This turns luster dust into paint—with no flavor trace after drying.
Tired of Takeout? 🥡
Get 10 meals you can make faster than delivery arrives. Seriously.
One email. No spam. Unsubscribe anytime.
Instructions
- Whip up the dough:
- In your biggest bowl, blend softened butter and granulated sugar until it nearly looks like frosting—light and creamy. Crack in the egg and pour in vanilla (and almond, if using); mix just long enough for the kitchen air to smell like a bakery, then gently incorporate flour and salt until no dry patches remain.
- Chill for best results:
- Divide the soft dough and press into discs—mine are always a bit misshapen, but that’s part of the charm. Wrap up and chill for at least 30 minutes, so your shapes hold firm in the oven.
- Shape and bake:
- Roll out chilled dough to 1/4-inch thickness amid a light dusting of flour; use zodiac or Taurus cutters and line each cookie on parchment, aiming for even spacing. Bake at 350°F until the barest golden blush edges appear, then let cool on wire racks while restraint is tested by all nearby.
- Mix up royal icing:
- Beat egg whites to soft peaks or combine meringue powder with water, and trickle in powdered sugar—slowly, or you will wear it. Add in lemon juice and vanilla, then keep mixing until it’s glossy and thick enough to hold soft points; pipe and flood cookies, and don’t be shy with colors if you like.
- Gold finishing touch:
- Patience is key: wait until icing has dried before you swirl gold luster dust with clear alcohol into a shimmering paint. Brush Taurus horns, constellations, or borders with a steady but playful hand, and let them all dry completely before arranging in a box.
- Gift-worthy presentation:
- Once dry and dazzling, nestle cookies gently into a gift box lined with parchment and, if the mood strikes, tuck in a zodiac card for personal flair.
 Save to Pinterest
 There was a time this cookie box went beyond being just a treat: A close friend unwrapped it at her birthday, eyes lighting up as she recognized her zodiac sign in the sparkling gold lines. In that little moment, shared over tea, cookies felt less like food and more like a way of saying “I know you.”
Decorator’s Confidence: Embracing Imperfection
Precision comes with practice, but it’s those slightly uneven golden borders and “almost” perfect constellations that make each treat personal. Don’t stress about piping every line straight; a bit of wobble means it’s homemade, and somehow the flaws become the charm. I used to fret when my icing cratered or wasn’t shiny enough, but now I see each cookie as part of the experience—not a test. Snap a picture before gifting, and you’ll be surprised by how lovely the so-called mistakes appear on camera. A little unevenness is part of the Taurus tenacity in every bite.
Flavor Switch-Ups to Suit Every Mood
If you want to make these cookies a recurring tradition, experiment with small tweaks. Swapping almond extract for orange or lemon zest is one of those subtle changes that surprised me with how fresh it tasted. Taurus loves the comfort of the familiar, but every once in a while, a playful twist keeps things exciting. For spring, I sometimes add a hint of matcha or rosewater for color and fragrance. Let your mood inspire your add-ins.
Making Ahead and Gifting Like a Pro
Cookie dough freezes beautifully—just thaw overnight in the fridge when the zodiac spirit moves you. Royal icing-covered cookies keep for days, especially in a lined box away from sunlight. I now prepare several dozen in one go, decorating over several evenings with a podcast in the background.
- Wrap finished cookies in parchment for extra freshness when gifting.
- Label your boxes with the baking date for a thoughtful touch.
- Remember: gold-painted cookies need a few hours to dry before their big reveal.
 Save to Pinterest
 Baking for the stars isn’t just about flavor—it’s about fun, artistry, and sharing a sparkling moment with someone special. Let your Taurus spirit shine, and enjoy every golden crumb.
Recipe FAQs
- → How do I prevent cookies from spreading?
Chill the dough for at least 30 minutes before rolling and again after cutting if warm. Work on a lightly floured surface, avoid over-creaming butter and sugar, and roll to an even 1/4-inch thickness for minimal spread.
- → What gives royal icing a smooth flood finish?
Beat egg whites or meringue powder to soft peaks, then add sifted powdered sugar until you reach a flood consistency (thick but pourable). Use a thinner flow for flooding and a thicker consistency for outlines; allow outlines to crust slightly first.
- → How do I achieve bright, durable gold decoration?
Mix edible gold luster dust with a few drops of clear alcohol (vodka or lemon extract) to make a paint. Apply only after royal icing is fully dry to avoid lifting or streaking; multiple thin layers build richer shine.
- → Can I make these cookies vegan?
Yes. Swap butter for a firm vegan butter and replace eggs with aquafaba in the cookie dough. For royal icing, use aquafaba with powdered sugar or a commercial vegan meringue powder alternative, then adjust consistency as usual.
- → How should I store the finished cookie box?
Store in a cool, dry place in an airtight box with parchment between layers. Let painted gold details cure fully before stacking. Cookies keep well for several days; avoid humid environments to protect royal icing.
- → Any tips for consistent icing color and shine?
Mix small test batches and rest colors briefly to remove air bubbles. Use gel colors sparingly to avoid thinning. For shine, buff dried gold gently with a clean, soft brush after the paint has fully set.