 Save to Pinterest
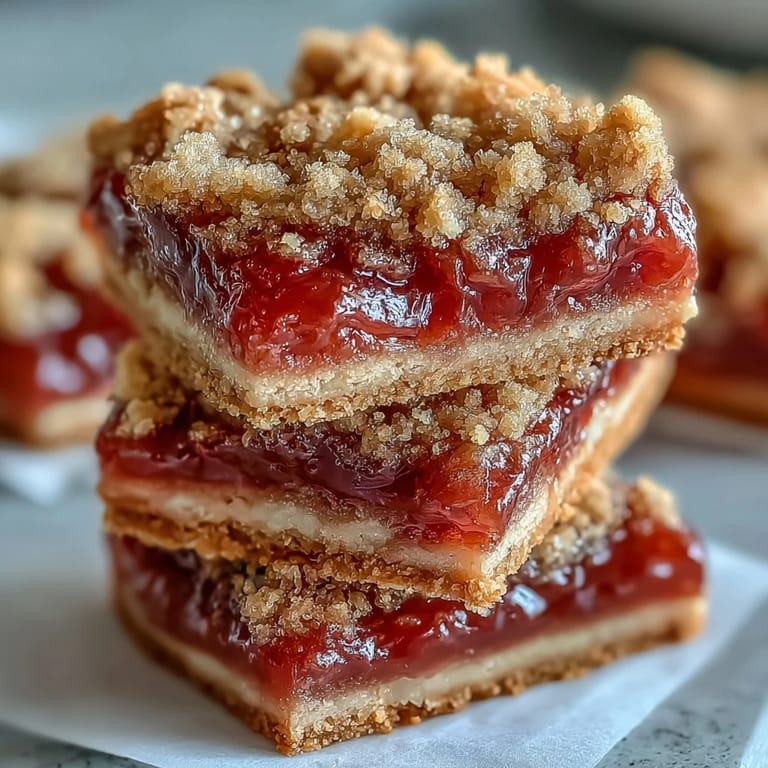
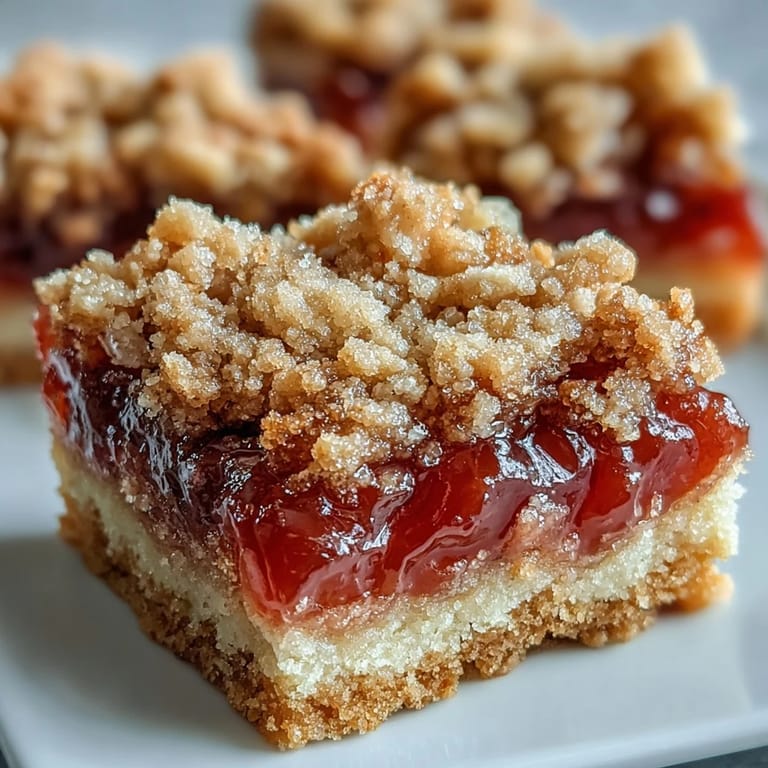
 My neighbor brought over a container of homemade guava jam last summer, and I had no idea what to do with it until I spotted these bars in an old cookbook. The combination of buttery, crumbly cookie with that bright, sweet guava filling felt like a small vacation in every bite. What started as an experiment became the dessert I make whenever I want to remind myself that the best flavors sometimes come from the simplest layered combinations.
I made these for a potluck last spring when someone mentioned they'd never had guava jam before, and watching their face light up after that first bite was worth every minute at the oven. That's when I realized these bars are more than just dessert—they're a conversation starter that brings people together over something unexpected and delicious.
Ingredients
- All-purpose flour: The foundation that gives structure to your base and streusel; make sure it's not packed when you measure so your bars stay tender and crumbly.
- Granulated sugar: Sweetens both the dough and the topping, creating a subtle contrast with the bold guava filling.
- Baking powder: A small amount lifts the dough just slightly so it doesn't feel dense or heavy.
- Salt: This tiny pinch does the heavy lifting by making the sweetness feel brighter and more balanced.
- Unsalted butter, cold and cubed: Cold butter is your secret weapon for achieving that signature crumbly texture everyone loves; letting it warm up even slightly will change everything.
- Large egg: Binds the dough just enough to hold it together without making it dense or cake-like.
- Vanilla extract: A subtle background note that makes the guava flavor shine even brighter.
- Guava jam or guava paste, softened: The star of the show that brings tropical warmth and natural sweetness; softening it slightly before spreading makes it easier to work with and helps it distribute evenly.
Tired of Takeout? 🥡
Get 10 meals you can make faster than delivery arrives. Seriously.
One email. No spam. Unsubscribe anytime.
Instructions
- Get Your Pan Ready:
- Preheat your oven to 350°F and line an 8x8-inch pan with parchment paper, letting the edges hang over the sides. This overhang becomes your handle later when you lift the whole thing out to cut.
- Mix the Dry Ingredients:
- In a bowl, whisk together your flour, sugar, baking powder, and salt until everything is evenly distributed. This simple step prevents lumps and ensures consistent texture throughout.
- Cut in the Butter:
- Add your cold, cubed butter and use a pastry cutter, fork, or your fingertips to break it into the flour until everything looks like coarse sand or breadcrumbs. The smaller the butter pieces, the crumblier your final bars will be.
- Bring It Together:
- Add the egg and vanilla extract and mix gently until a crumbly dough forms. You're not looking for a smooth paste here—texture and crumb are what make these special.
- Build Your Base:
- Press about two-thirds of the dough evenly into the bottom of your prepared pan, using your fingers or the back of a measuring cup to create an even layer. Don't worry about making it perfectly smooth; slight imperfections actually help the jam adhere.
- Add the Star Ingredient:
- Gently spread your guava jam over the base, leaving a small border around the edges so the layers stay distinct. A small offset spatula or the back of a spoon works beautifully for this.
- Create the Streusel Topping:
- Crumble the remaining dough evenly over the jam layer, letting the pieces fall naturally rather than pressing them down. This creates those lovely golden crumbs everyone goes for first.
- Bake Until Golden:
- Bake for 35 to 40 minutes until the top is lightly golden and you can smell that warm, buttery aroma filling your kitchen. The exact time depends on your oven, so start checking around the 35-minute mark.
- Cool Completely:
- Let the bars cool completely in the pan before you even think about cutting them. This patience pays off because warm bars will crumble, but cooled ones will slice cleanly and hold their shape beautifully.
 Save to Pinterest
 There's something about the moment you pull these bars from the oven and the whole kitchen fills with that warm, buttery, fruity smell that makes the world feel a little softer. My kids still ask for these more than any other dessert I make, and honestly, that's the highest compliment a recipe can get.
Flavor Swaps You'll Want to Try
Once you understand how this recipe works, you become dangerous in the best way. Raspberry jam brings a tartness that feels summery, apricot paste adds earthiness and elegance, and mango creates a different kind of tropical sweetness that feels lighter and brighter. I've even used a combination of two jams swirled together, and the results were just as magical. The beauty of this base is that it lets whatever filling you choose be the star.
Texture is Everything Here
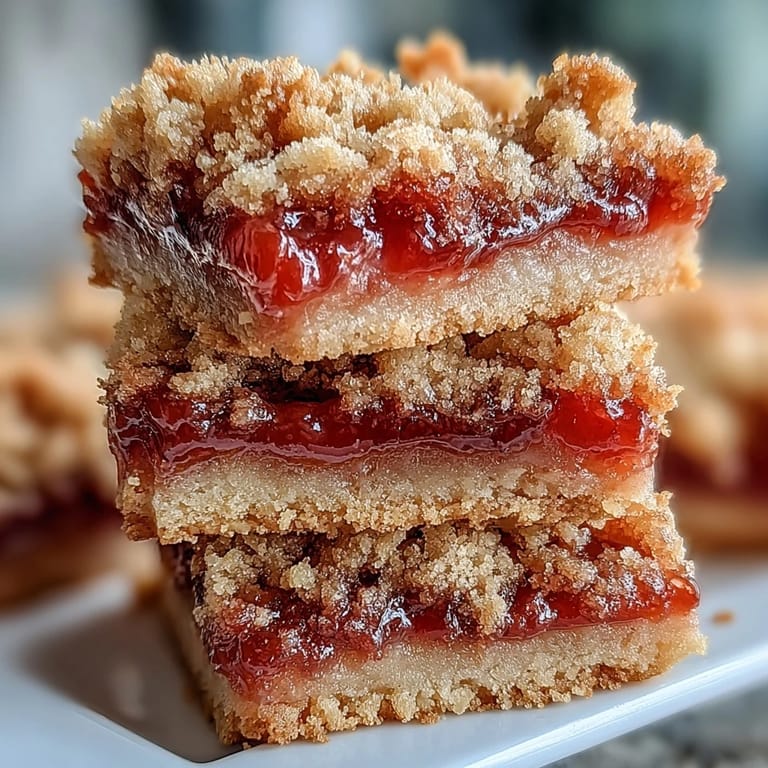
The magic of these bars lives in that contrast between the tender, crumbly base and the jammy center and streusel top. This only happens if you treat your butter like it's precious—cold cubes make crumbly bars, while softened butter makes cake. I learned this the hard way by trying to soften my butter while making the recipe, and the result was a dense, cakey disappointment that taught me the value of patience and proper ingredient temperature.
Making Them Even More Special
These bars shine exactly as they are, but a few additions can take them from weeknight dessert to something you'd serve at a dinner party. Toasted nuts mixed into the streusel add crunch and richness, a light dusting of fleur de sel on top brings out the sweetness, and serving them alongside vanilla ice cream or whipped cream turns them into something truly memorable. Think of these variations as tools in your back pocket for when you want to show off a little.
- Mix 1/2 cup of chopped toasted pecans or almonds into your streusel mixture for added crunch and nutty depth.
- A tiny pinch of fleur de sel sprinkled on top after baking enhances the sweetness without making anything taste salty.
- Serve warm or at room temperature with vanilla ice cream or fresh whipped cream for maximum indulgence.
 Save to Pinterest
 These bars have become my answer to almost every dessert occasion because they're foolproof enough for someone just starting out and interesting enough to keep experienced bakers excited. Make them once, and you'll understand why they're worth keeping in your regular rotation.
Recipe FAQs
- → Can I use fresh guava instead of jam?
Fresh guava doesn't work well here because it releases too much liquid during baking. Stick with guava jam or paste for the best texture and consistency. You can make your own guava jam by cooking fresh guava with sugar until thickened.
- → Why is my dough too soft to crumble?
If your dough feels too soft, it's likely the butter was too warm or overmixed. Chill the dough for 15–20 minutes until firm. Cold butter creates those desirable crumbly pockets in the streusel topping.
- → How do I know when the bars are done?
The bars are finished when the streusel topping turns golden brown and the edges start to pull away slightly from the pan. The center should feel set, not jiggly. Overbaking will make them dry, so check around the 35-minute mark.
- → Can I make these ahead of time?
Absolutely. These bars actually taste better the next day as flavors meld. Store in an airtight container at room temperature for up to 5 days, or freeze for up to 3 months. Thaw frozen bars at room temperature before serving.
- → What other fruit fillings work well?
Apricot, raspberry, mango, and even fig jam all pair beautifully with the buttery shortbread base. Choose a high-quality jam with good fruit content for the best flavor. Avoid overly sweet preserves—the buttery base balances sweeter jams perfectly.
- → Do I need to peel the bars from the parchment?
The parchment overhang is crucial for easy removal. Let the bars cool completely in the pan, then use the parchment to lift the entire slab onto a cutting board. This prevents breaking and gives you clean, even squares.